How to Create a Whop App
FAQs
What is a Whop?
An online marketplace for buying and selling digital products. These products could be access to a video course, an app, a PDF, a link to a website, or anything else that can be delivered digitally. 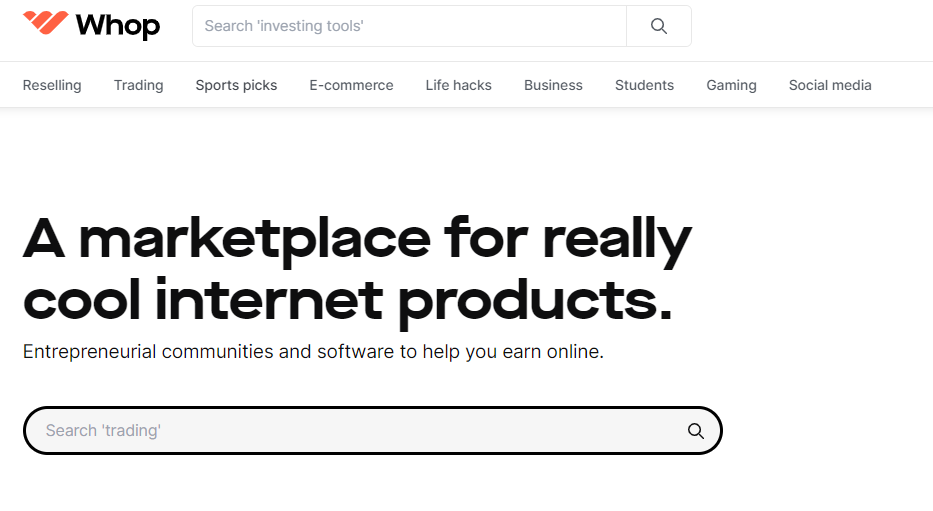
What is a Whop App?
Not all sellers are technical or have time to build out tools that help them deliver their digital products to their customers. So, the sellers can use these apps to help them out. Some examples:
- an app that allows a seller to create video courses
- an app that allows downloading and tracking any simple file
- an app that allows streaming video and taking donations
- an app that shows product analytics to grow sales
What we will be making?
A simple app that allows sellers to create any events, and buyers can bet on the outcome of the event. Once the event is over, a payout is made to the winners. This is similar to sites like https://manifold.markets/, but simpler in scope. 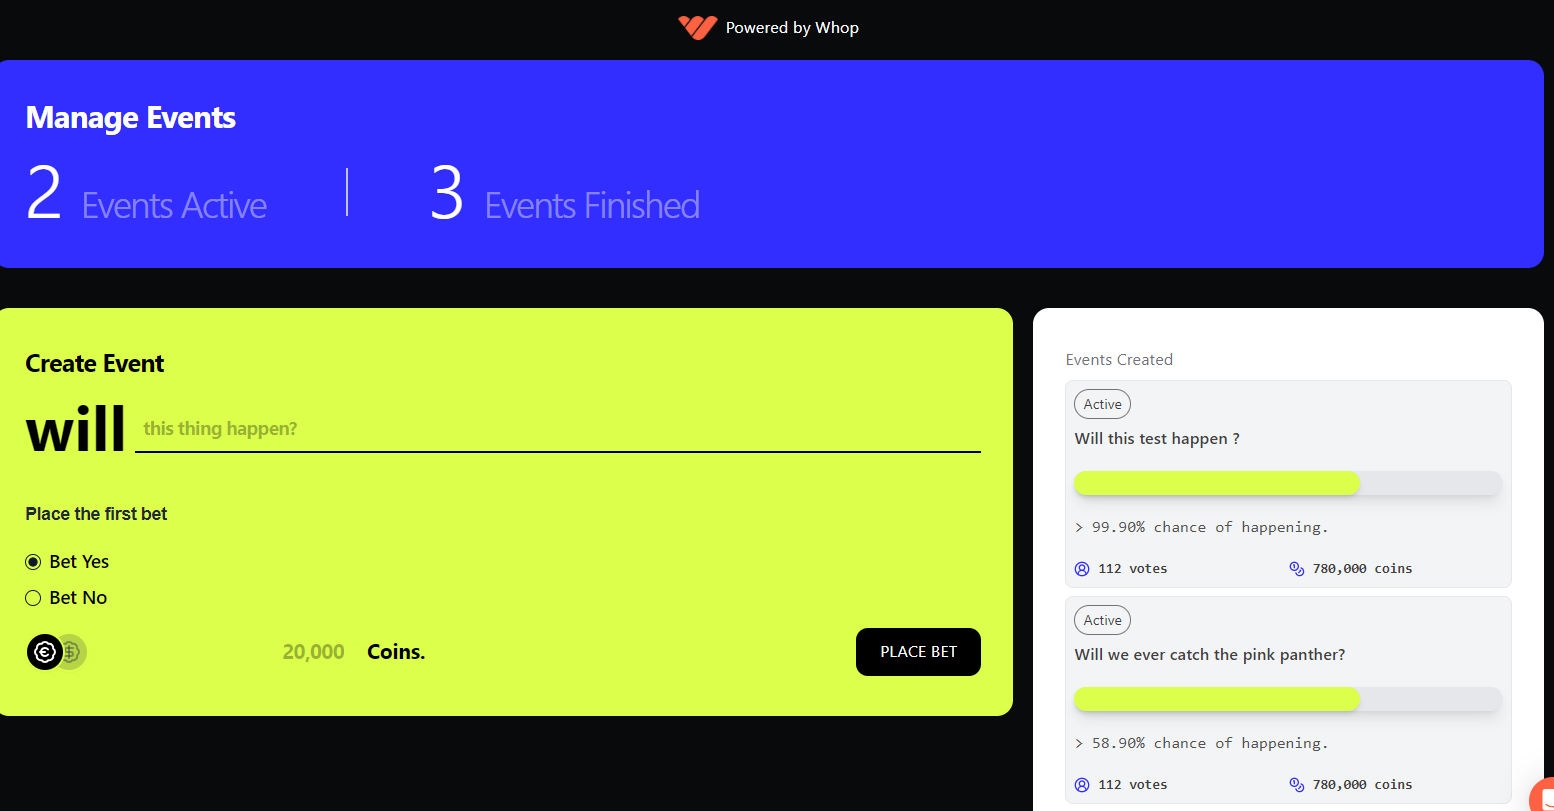
What is the tech stack?
- Next.js for the frontend
- Firebase for the backend
- Whop SDK for the integration with Whop
- Tailwind CSS for the styling
- Zustand for the state management
Code
Code is available on Github.
Security
For the purpose of this tutorial, we will not be implementing any auth using Firebase to reduce the complexity of the tutorial. However, for a production app, you should implement auth.
Getting Started
System Design
We do a very barebones system design to understand the data flow and the components involved. You can find the Figjam where we have done the system design here.
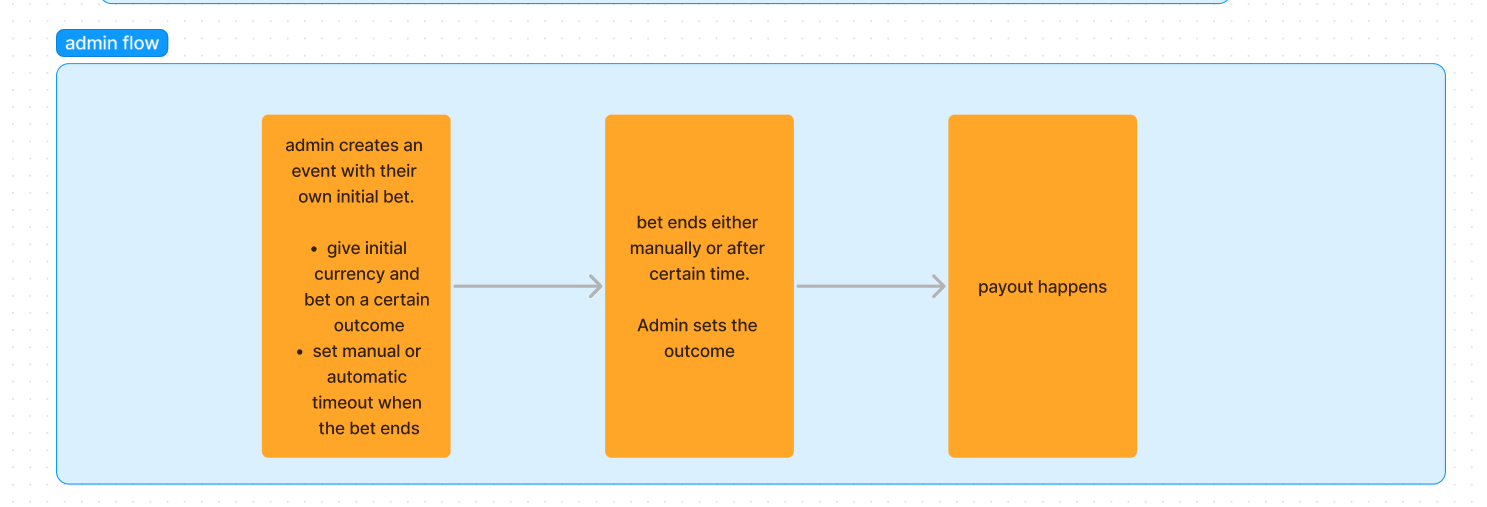
It consists of three parts -
user flow: how the user will interact with the app (view and place bets)
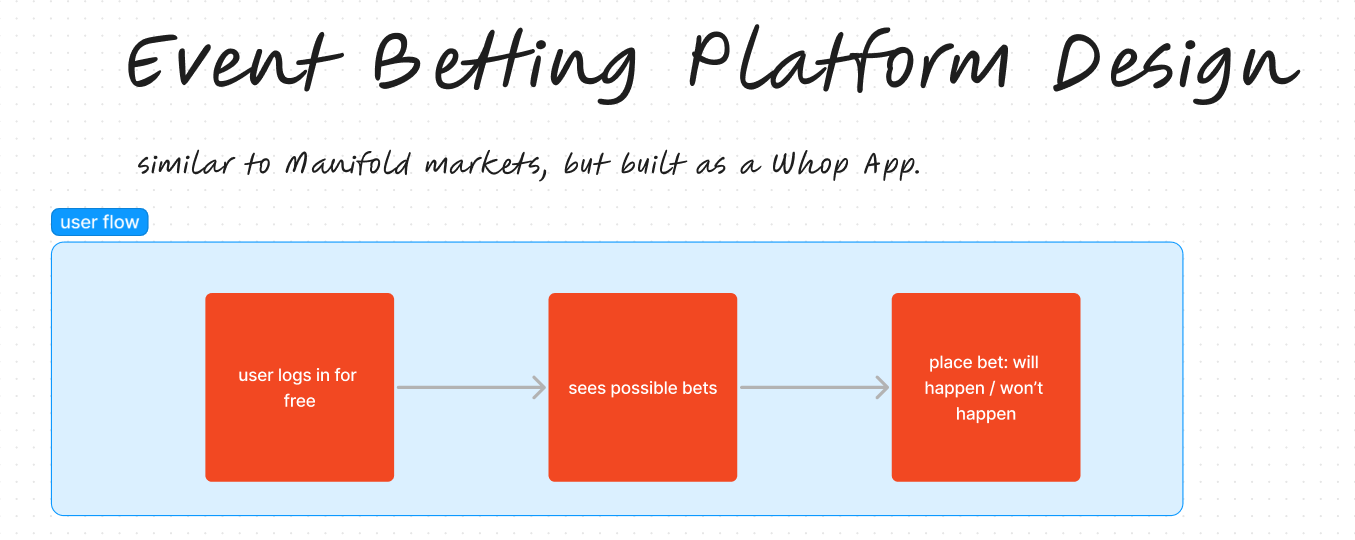
admin flow: how the seller will interact with the app (create events)
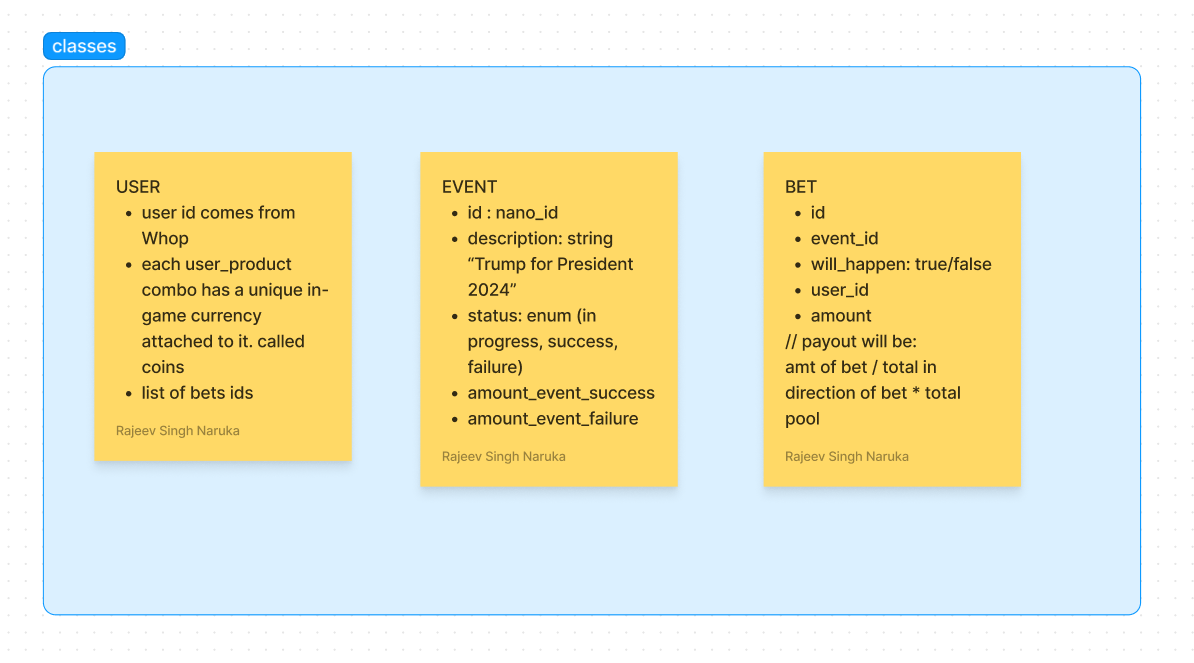
system design: what objects will be stored in the database
Create a Firebase Project
- Go to https://console.firebase.google.com/
- Create a new project
- Go to the project settings
- Go to the service accounts tab
- Click on the "Generate new private key" button
- Save the file as
serviceAccountKey.jsonin the root of the project
We will use the contents of this file to initialize the Firebase Admin SDK.
Create a Whop App
- Go to https://whop.com/apps
- Click on the "Add App" button on the left sidebar
- Once created, go to "integration" and copy App ID and API key
- Keep these values handy as we will need them later
Clone the sample repo
- Clone the sample repo from https://github.com/toughyear/whop-betting-app
- Run
pnpm installto install the dependencies - create
.env.localfile in the root of the project - Add the following values to the
.env.localfile
WHOP_API_KEY=
NEXT_PUBLIC_WHOP_APP_ID=
# FIREBASE KEYS
NEXT_PUBLIC_FIREBASE_API_KEY=
NEXT_PUBLIC_FIREBASE_AUTH_DOMAIN=
NEXT_PUBLIC_FIREBASE_PROJECT_ID=
NEXT_PUBLIC_FIREBASE_STORAGE_BUCKET=
NEXT_PUBLIC_FIREBASE_MESSAGING_SENDER_ID=
NEXT_PUBLIC_FIREBASE_APP_ID=
NEXT_PUBLIC_FIREBASE_MEASUREMENT_ID=
- Replace the values with the values from the previous steps
- start the proxy server by running
pnpm run whop-proxy. This will start a proxy server that will proxy all the requests to Whop website.
Setting up App on Whop
- Go to integration tab on the app page on Whop
https://whop.com/apps/biz_[BIZ_ID]/app_[APPID]/integration/ - click on Add view > Consumer product > set default template path.
- click on Add view > Seller product > set default template path.
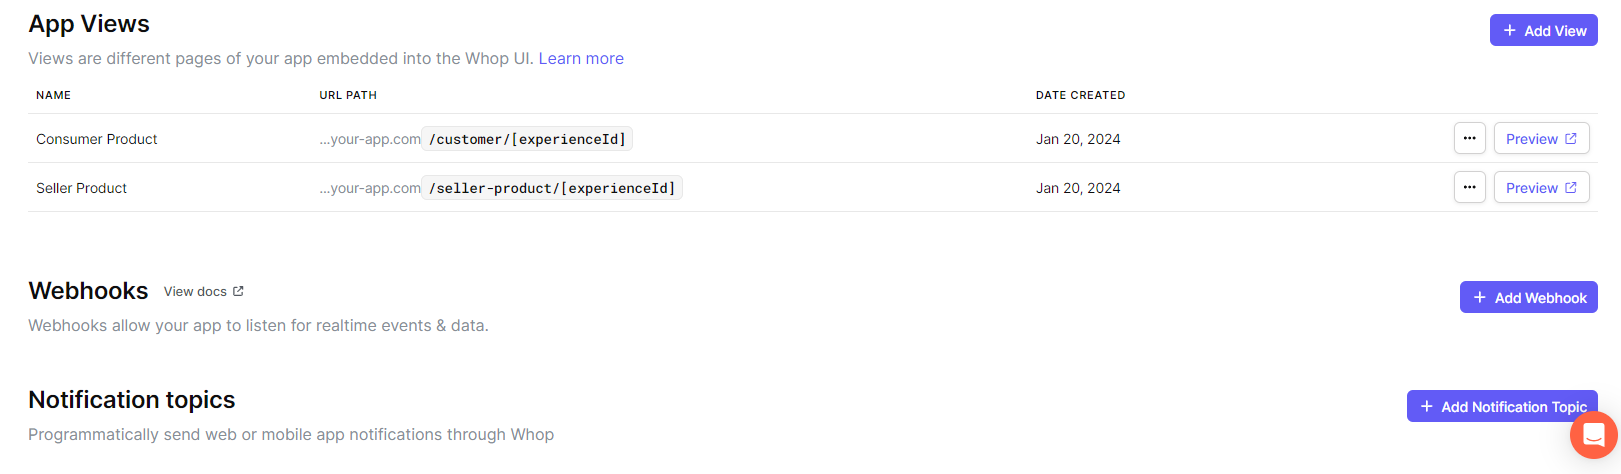
Once done, you can click on the "Preview" button to see that particular UI in action as shown in the image above.
Understanding the Code Structure
app\seller-product\[experienceId]\page.tsx- This is the page that will be shown to the seller once they have installed your app on their Whop account.
In our case, this UI will allow the admins to create events.
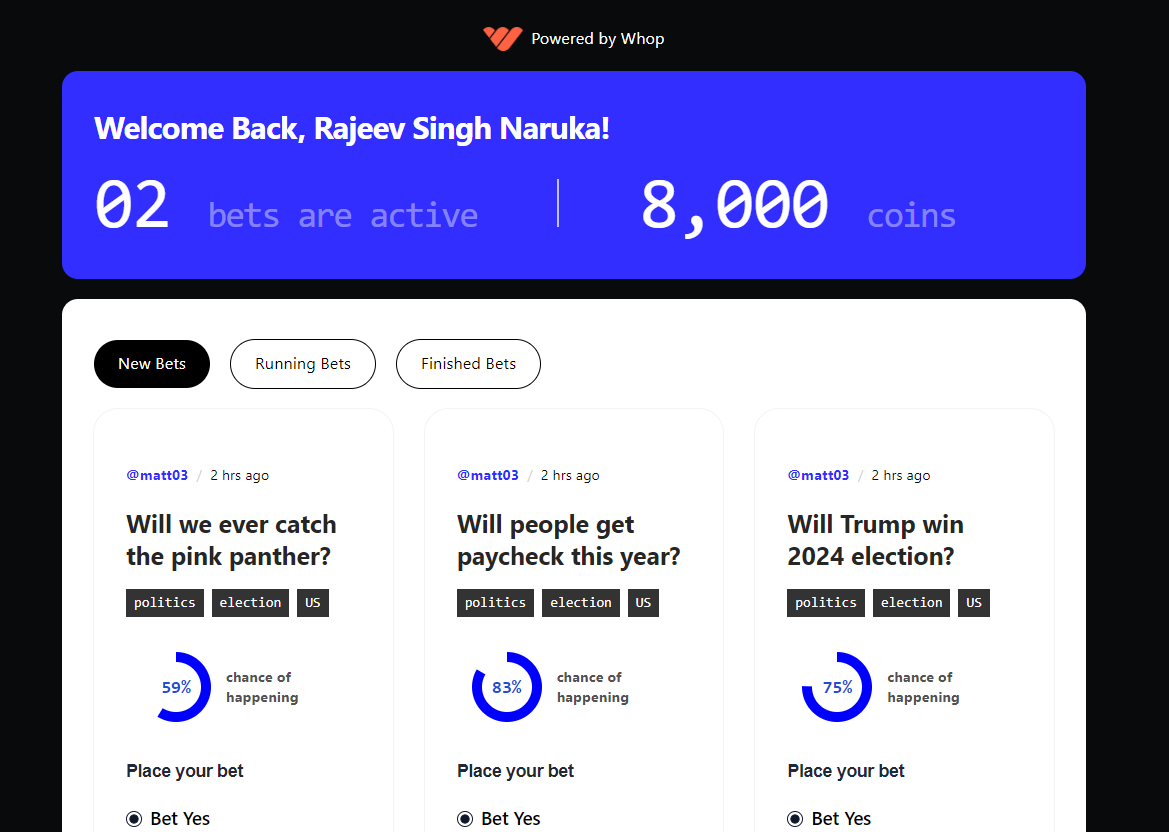
app\customer\[experienceId]\page.tsx- This is the page that will be shown to the customers. In our case, this UI will allow the customers to bet on the events that the particular admin has created.
How to validate admin
The Whop apps load within the iframes of the Whop website. This simplifies identifying if the user is authenticated and if the user is an admin. This logic is in the app\seller-product\[experienceId]\page.tsx file. Here we use the WhopAPI.app() method to get the app instance. Using it further to fetch the info about the experience and if the user has access to it.
// Fetch information about experience
const experience = await WhopAPI.app().GET('/app/experiences/{id}', {
  params: { path: { id: experienceId } },
  next: { revalidate: 3600 }, // Customize next revalidation logic
})
import { WhopAPI, authorizedUserOn, hasAccess } from "@whop-apps/sdk";
...

    // Ensure user is an admin of the company
  if (
    !(await hasAccess({
      to: authorizedUserOn(experience.data.company_id),
      headers,
    }))
  ) {// unauthorized
How to Validate Customer
The logic for validating the customer is similar to the admin. Go to the app\customer\[experienceId]\page.tsx file to see how we use the Whop SDK to validate the customer.
Integrating with Firebase
We use Firebase to store the data about the events and the bets. Following is the rough schema of the data that we store in Firebase. See the Figjam here.
What's Next?
To keep the scope of the tutorial small, we have not implemented the following features:
- authorization using Firebase, use Firestore rules to manage granular and correct access
- payout to the winners
- some of the UI elements are hardcoded. Need to updated from the Firestore DB.
There are probably a lot of bugs and edge cases that we have not covered that is required for a production app. So, please use this as a starting point and experiment with it as you like!
Any questions? Reach out to me on Twitter @toughyear